Quick Facts
- Category: Cloud Computing
- Published: 2026-05-17 14:07:24
- Terminal-Based Observability: How the gcx CLI Bridges the Gap for Engineers and AI Agents
- IBM's Bob Platform: AI-Assisted Development with Built-In Governance and Audit Trails
- How Cloudflare Optimizes Its Global Network for Large Language Models
- How to Safeguard Your Private Chats on Instagram After Meta's E2EE Retreat
- 10 Surprising Science Facts Every Expectant Parent Should Know
Introduction
After two years of running Vaultwarden on my Proxmox home server, I can confidently say it’s the best password management decision I’ve made. Cloud services like LastPass have their advantages—simplicity, automatic updates, and zero maintenance—but they come with privacy risks, subscription fees, and recent security incidents that make self-hosting more appealing than ever. Vaultwarden, an open-source, lightweight implementation of Bitwarden’s server, runs perfectly on a Proxmox virtual environment. This guide will walk you through every step, from preparing your Proxmox host to securing daily backups, so you can kiss cloud-based password managers goodbye.
What You Need
Before starting, gather these prerequisites:
- Proxmox VE host (version 7.x or newer) with sufficient RAM (at least 4 GB) and storage (10 GB free).
- Basic Linux command-line knowledge – you’ll use the Proxmox shell or an SSH connection.
- Docker or Podman – we’ll deploy Vaultwarden as a container for simplicity and isolation.
- Domain name (optional but recommended) – for secure HTTPS access via a reverse proxy like Nginx Proxy Manager.
- Backup strategy – external storage or another Proxmox host for periodic exports.
Step‑by‑Step Deployment Guide
Step 1: Prepare Your Proxmox Environment
First, log into your Proxmox web interface (https://your-server-ip:8006). Navigate to your target node and create a Linux container (LXC) or a lightweight VM. I recommend a Debian 12 LXC – it’s resource-efficient and rock solid. Allocate at least 1 GB RAM and 8 GB disk. Ensure the container has network access. Once created, start the container and open its console.
Step 2: Install Docker (or Podman)
Inside the container, update packages and install Docker:
apt update && apt upgrade -y
apt install -y apt-transport-https ca-certificates curl gnupg
curl -fsSL https://download.docker.com/linux/debian/gpg | gpg --dearmor -o /usr/share/keyrings/docker.gpg
echo "deb [arch=$(dpkg --print-architecture) signed-by=/usr/share/keyrings/docker.gpg] https://download.docker.com/linux/debian $(lsb_release -cs) stable" > /etc/apt/sources.list.d/docker.list
apt update
apt install -y docker-ce docker-ce-cli containerd.io
Verify installation: docker --version. If you prefer Podman, the commands are similar; just substitute “podman” for “docker” in the steps below.
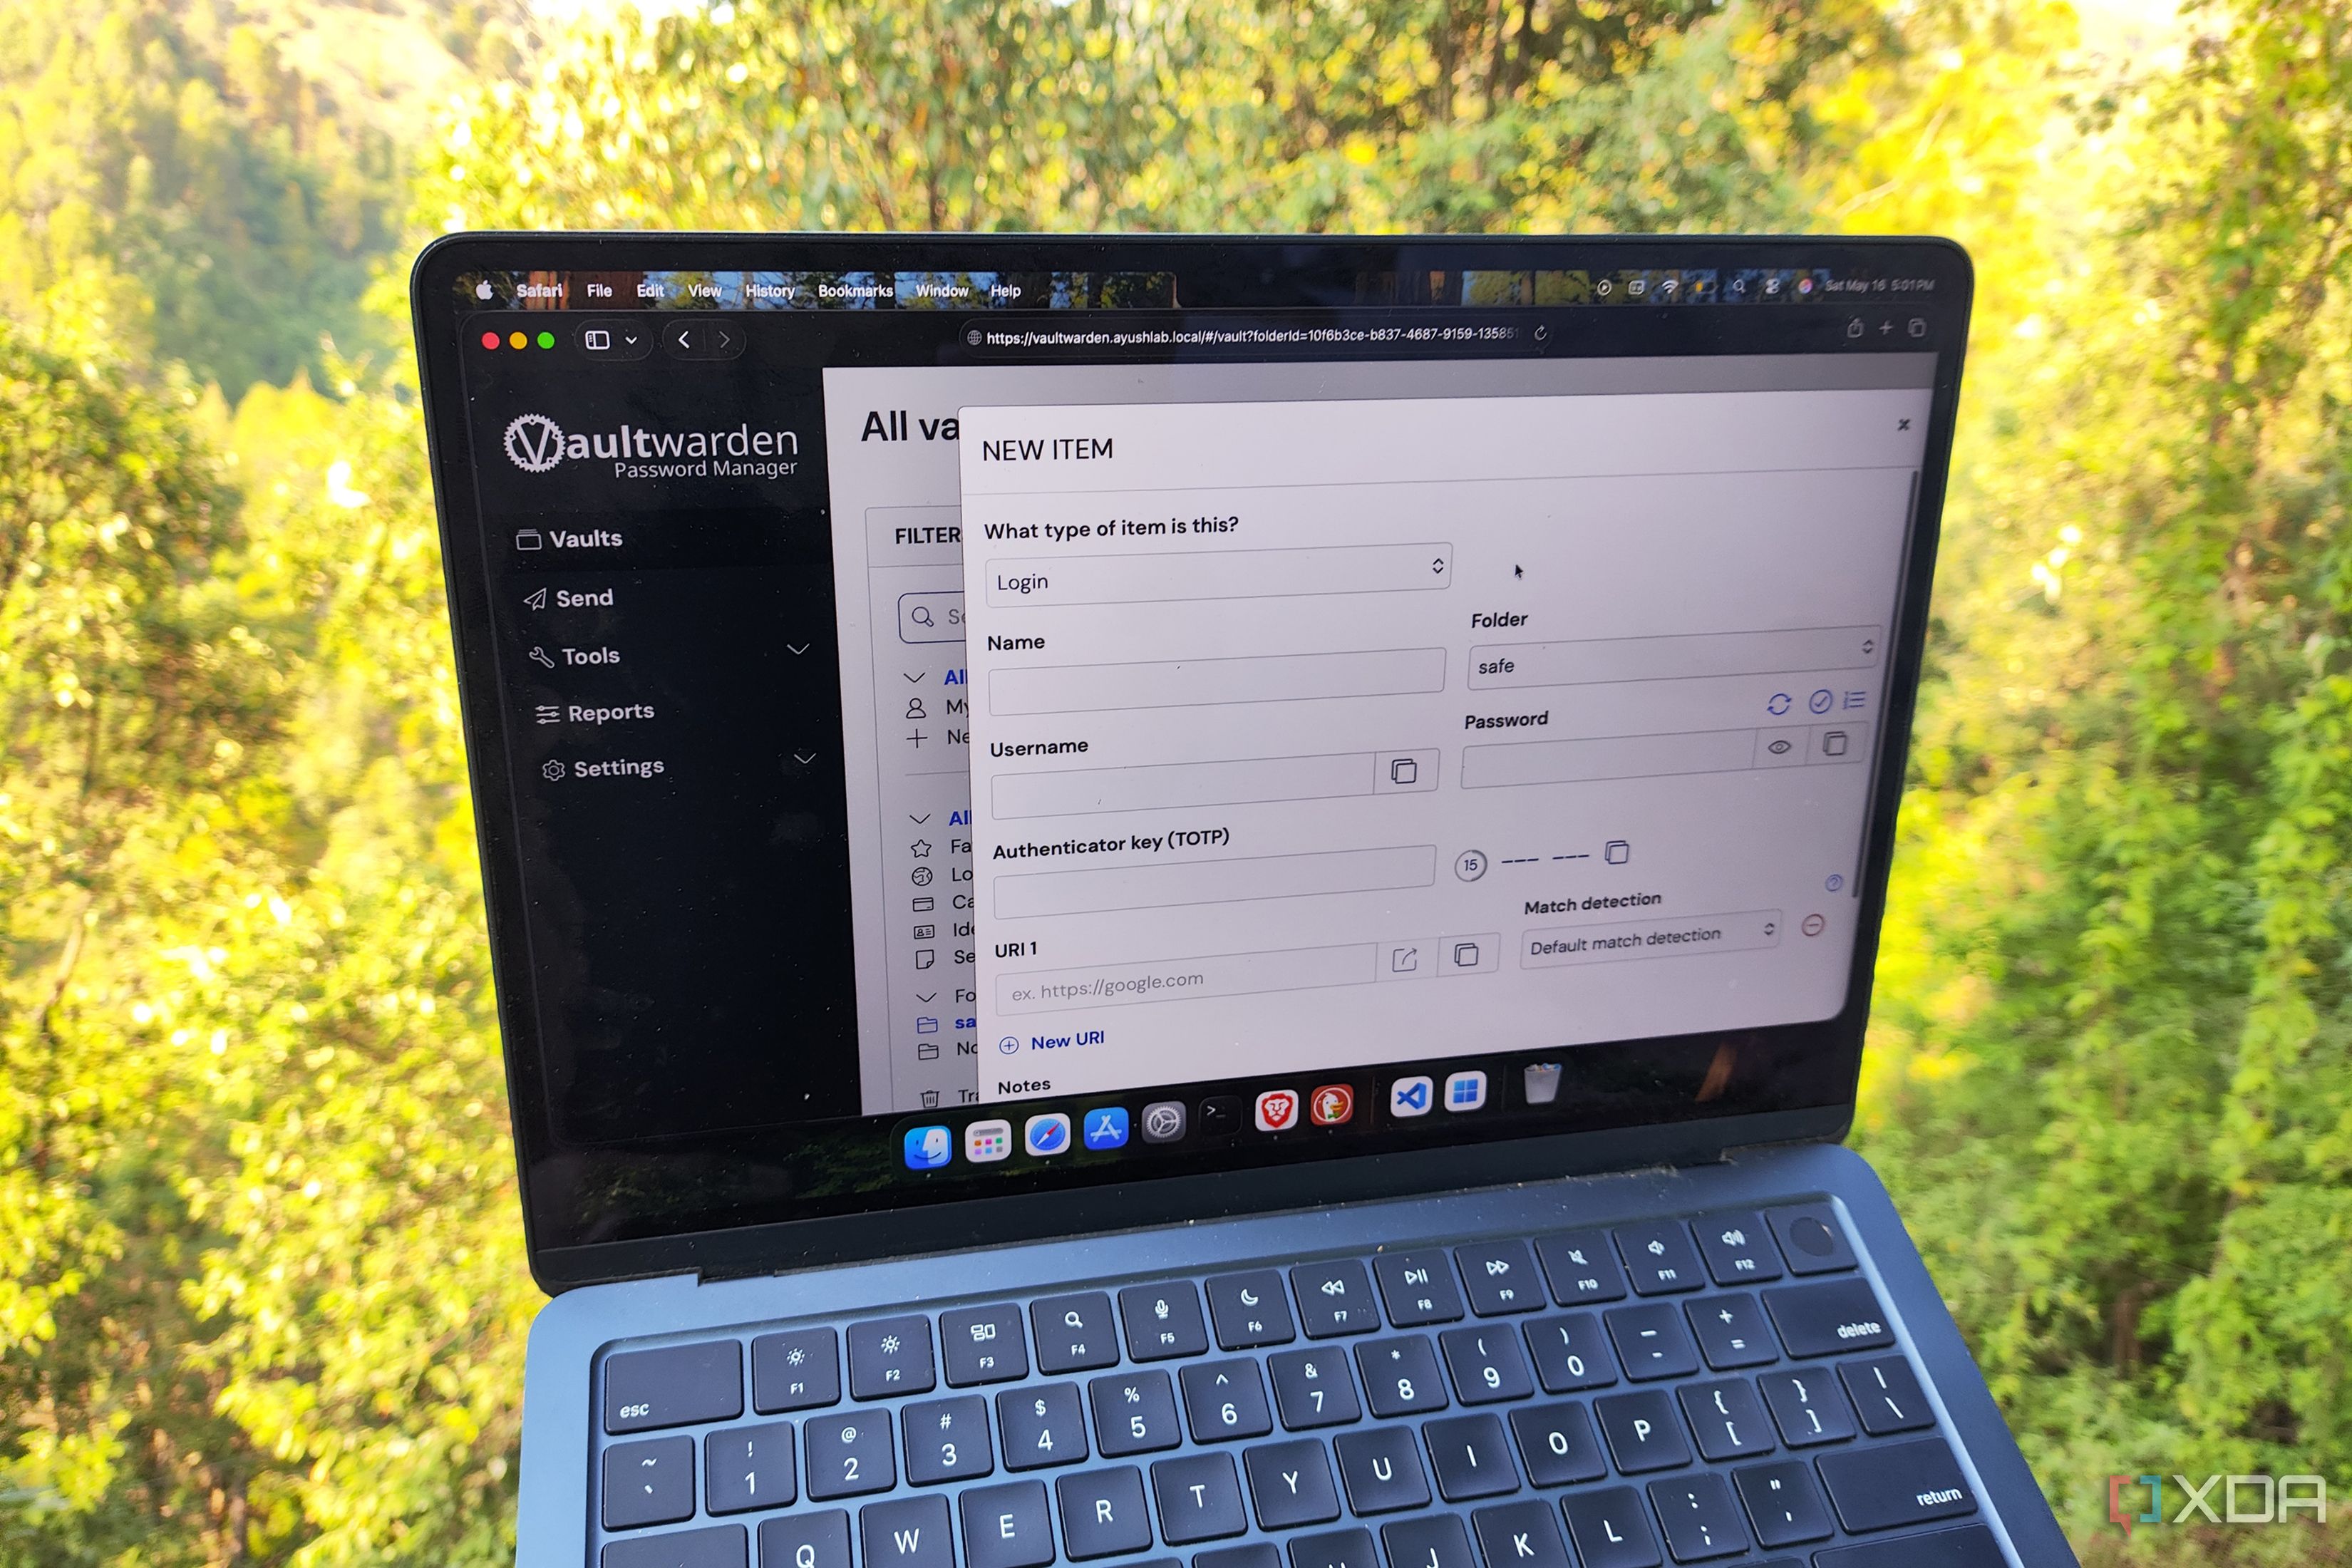
Step 3: Pull and Run Vaultwarden
Use the official Vaultwarden Docker image. Create a persistent volume for data:
docker volume create vaultwarden_dataNow run the container:
docker run -d --name vaultwarden \
  -e SIGNUPS_ALLOWED=false \
  -v vaultwarden_data:/data \
  -p 127.0.0.1:8080:80 \
  vaultwarden/server:latest
Important: Binding the container to localhost (127.0.0.1) ensures it’s not directly exposed to the network. We’ll add a reverse proxy later. The SIGNUPS_ALLOWED=false environment variable prevents open registration – you’ll create the first admin user via the command line or a temporary signup.
Step 4: Set Up the Admin User
To create the first user, you need to register once. Either restart the container with -e SIGNUPS_ALLOWED=true for a few minutes, or use the admin panel token. The simplest method is to use the CLI inside the container:
docker exec -it vaultwarden /vaultwarden --admin /dataFollow the prompts to set your admin email and password. Once done, disable signups permanently by removing the env var or setting it to false and restarting: docker restart vaultwarden.
Step 5: Configure a Reverse Proxy with SSL
Expose Vaultwarden securely. On the Proxmox host (or a separate container), install Nginx Proxy Manager (NPM) or Caddy. For example, using NPM:
- Create a new proxy host pointing to
http://vaultwarden-container-ip:8080. - Obtain a free Let’s Encrypt certificate via NPM’s SSL tab.
- Set a custom domain like
vault.yourdomain.comand force HTTPS.
If you don’t own a domain, you can use Tailscale for encrypted access. Install Tailscale on the container and access via http://container-tailscale-ip:80.
Step 6: Test the Connection
Open your browser and go to https://vault.yourdomain.com (or your Tailscale address). You should see the Vaultwarden login page. Log in with the admin credentials you created. If you see an error, check container logs: docker logs vaultwarden. Common issues: port conflicts or firewall rules on Proxmox.
Step 7: Import Data from LastPass (or Other Managers)
Export your passwords from LastPass as a CSV file. Then, in Vaultwarden, go to Tools → Import Data. Choose “LastPass (CSV)” format and upload the file. Vaultwarden will parse and import all logins, notes, and folders. Review the import result and fix any mismatched fields.
Step 8: Set Up Automated Backups
Your Vaultwarden data lives in the Docker volume vaultwarden_data. Create a simple backup script on the Proxmox host:
#!/bin/bash
BACKUP_DIR="/mnt/backup/vaultwarden"
mkdir -p $BACKUP_DIR
docker exec vaultwarden tar czf - /data > $BACKUP_DIR/vaultwarden_$(date +%Y%m%d_%H%M%S).tar.gz
find $BACKUP_DIR -type f -mtime +30 -delete
Make it executable (chmod +x) and schedule it via cron: crontab -e and add 0 3 * * * /path/to/backup.sh. This runs daily at 3 AM and keeps only the last 30 days.
Step 9: Enable Two-Factor Authentication (2FA)
Security is paramount. In your Vaultwarden web vault, go to Settings → Security → Two-Factor Authentication. Enable TOTP using an authenticator app like Authy or Google Authenticator. This adds an extra layer even if your password is compromised.
Step 10: Monitor and Maintain
Check container logs weekly for any errors: docker logs --tail 50 vaultwarden. Update the Vaultwarden image every month: pull the latest (docker pull vaultwarden/server:latest) and recreate the container (docker stop vaultwarden && docker rm vaultwarden and re-run the command from Step 3 with the same volume). Your data persists in the volume.
Tips for a Smooth Experience
- Keep the host system updated – Proxmox security patches are critical. Schedule monthly updates for both host and container.
- Use a dedicated LXC container – Isolating Vaultwarden from other services reduces attack surface and simplifies resource allocation.
- Limit login attempts – Set environment variables like
ADMIN_RATE_LIMITandUSER_RATE_LIMITin the Docker run command to prevent brute-force attacks. - Test restores – Periodically restore your backup to a test container to ensure your export/import pipeline works.
- Consider hardware security keys – Vaultwarden supports FIDO2/WebAuthn for passwordless logins; enable it for extra security.
- Enable admin 2FA – The admin panel itself can be protected behind TOTP. Use the administrative endpoint
/adminto set that up.
After two years of self-hosting Vaultwarden on Proxmox, I can confirm it’s reliable, fast, and far more private than any cloud service I’ve used. You control your data, there are no subscription fees, and the community support is excellent. Give it a try – you won’t miss LastPass either.